Github repository#
Note
All instructions and images showed bellow are provided by GitHub here.
Creating a GitHub Repository#
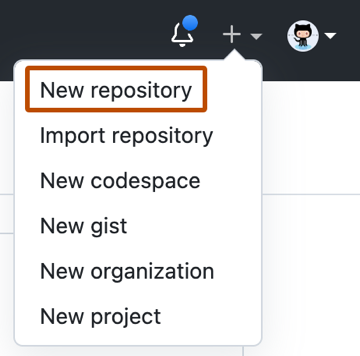
In the upper-right corner of any page, use the drop-down menu, and select New repository.

Type a short, memorable name for your repository.

Optionally, add a description of your repository.

Choose a repository visibility.

Select Initialize this repository with a README. You can also choose start with the licence and the
.gitignorefiles.

Note
You should also add a .gitignore and a licence. Please see here for more information related with Licence.
For research, it is also convenient to create a citation file. See here for more information related with Citation file.
Click Create repository.

Making and committing changes#
In your repository’s list of files, click README.md.

Above the file’s content, click in the pencil icon.
On the Edit file tab, type some text.
You can preview (
Preview changestab) your changes before commit.New content is highlighted in green
Removed content is highlighted in red
At the bottom of the page, type a short, meaningful commit message that describes the change you made to the file.

Below the commit message fields, decide whether to add your commit to the current branch or to a new branch.

Click Propose file change

Note
the git add command is not necessary here. Github automatically put the
changed file in the staged area.
Despite simplifying the workflow for small changes, this procedure makes it impossible to add several changes to the same commit.
